
Before and After – Upcycled Shirts
After moving into our house last summer, we made a conscious effort to try and not to hold onto too much stuff. Both Jake and I have accumulated a lot of furniture and miscellaneous items from our college years and married life. We wanted our first home that we owned to include only the furniture, decorations, and clothing that we loved and wanted to keep. So much of our belongings were mismatched and handmedowns. Although I love saving money and I see nothing wrong with mismatched and handmedowns, I still knew we needed a good weeding out of things that we didn’t love, but still felt like we had to hold onto since it was at one time free to us. When we moved in, we sorted and made a donation pile for our local Salvation Army. So that helped our surplus of goods dwindle while allowing someone else to find a new treasure. Fast forward to today and we still find our selves with a lot of stuff lying around the house. The idea of having a garage sale this summer was formed.
I gutted my closet. I’m 26 and I still have a lot of clothes from when I was in high school! I think that is a nice example of my penny pinching ways. Most of the clothes still fit and are in good shape, but they really are no longer in my style or aesthetic. I have grown to want a more polished and mature wardrobe to be a reflection of myself. I also love making things so the thought of refashioning some of my current clothes really excites me. An added bonus as a FACS teacher is that since I teach sewing, I can inspire my students to design and sew their own clothes too .
It was a weekend morning and I didn’t have much planned for the day other than doing my normal: laundry, dishes, groceries, lunch, supper, and spend time with my husband and son. But I felt ambitious and wanted to make something DIY while our son took his usual two naps during the day. I was about to head to our local thrift store to find an old shirt to cut up and refashion, but then I remembered I had a closet full of clothes waiting to be included in our garage sale!!! I found a few nice solid colored knit t-shirts that I was saving for making into little boy shirts. But then I came across my husband’s old striped long sleeve shirt from American Eagle and I knew I wanted to do something with it since striped shirts have been so trendy lately. I love a pop of bright color with neutrals so I was pleased when I found my pink, raglan, 3/4 sleeve that was also in our garage sale pile. These were perfect contenders for my weekend refashion project because I knew that I could keep the existing seam finishes for the waist and cuffs, which would cut down on the time spent making it. I found a very helpful tutorial about how to make a raglan sleeve shirt from scrap fabric that I used as a starting point. But since I wanted to use the existing cuffs from the pink shirt, I I used her tutorial as a general guide and went my own route to construct the shirt.
Here’s what I did, I hope you enjoy!
Before

Before – Striped Shirt
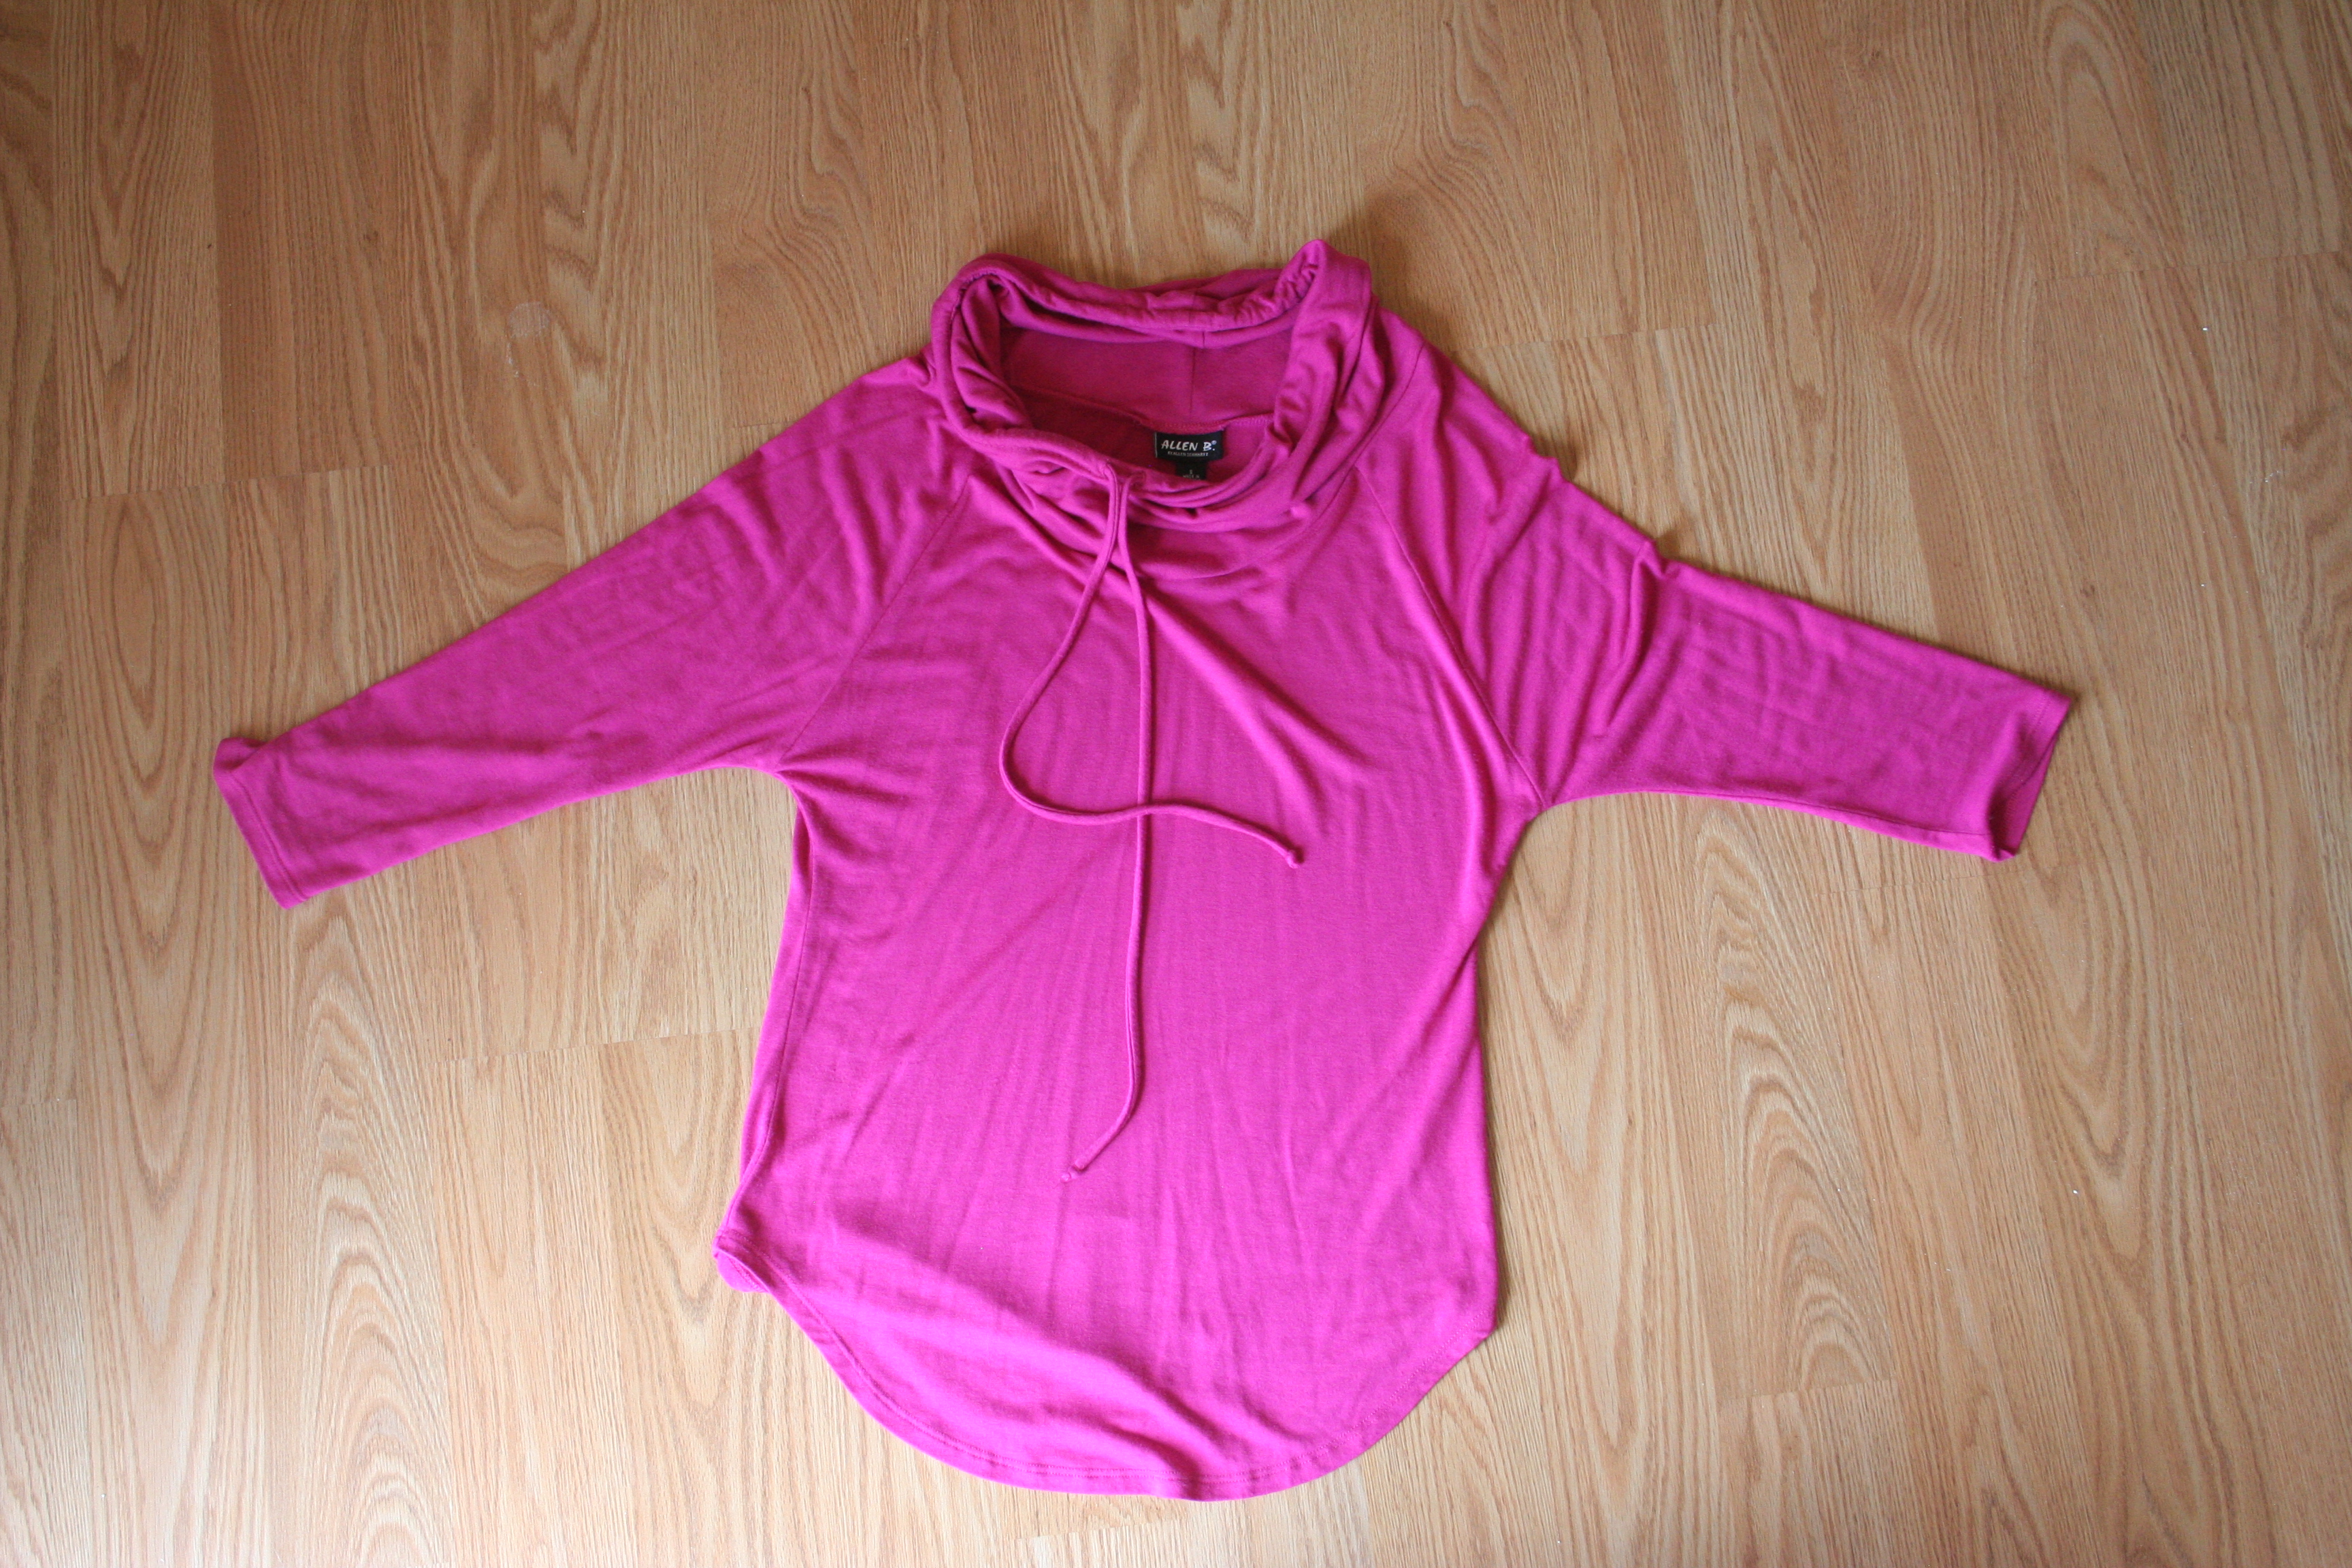
Before – Pink Raglan Sleeves
I started with my husband’s American Eagle striped shirt and my pink raglan sleeve shirt. Both were knits and had stretch, although the pink shirt was much lighter in weight so I was afraid the difference in material would be a factor in the end product. But when I was done, I felt like the material difference wasn’t a huge deal for this diy project.
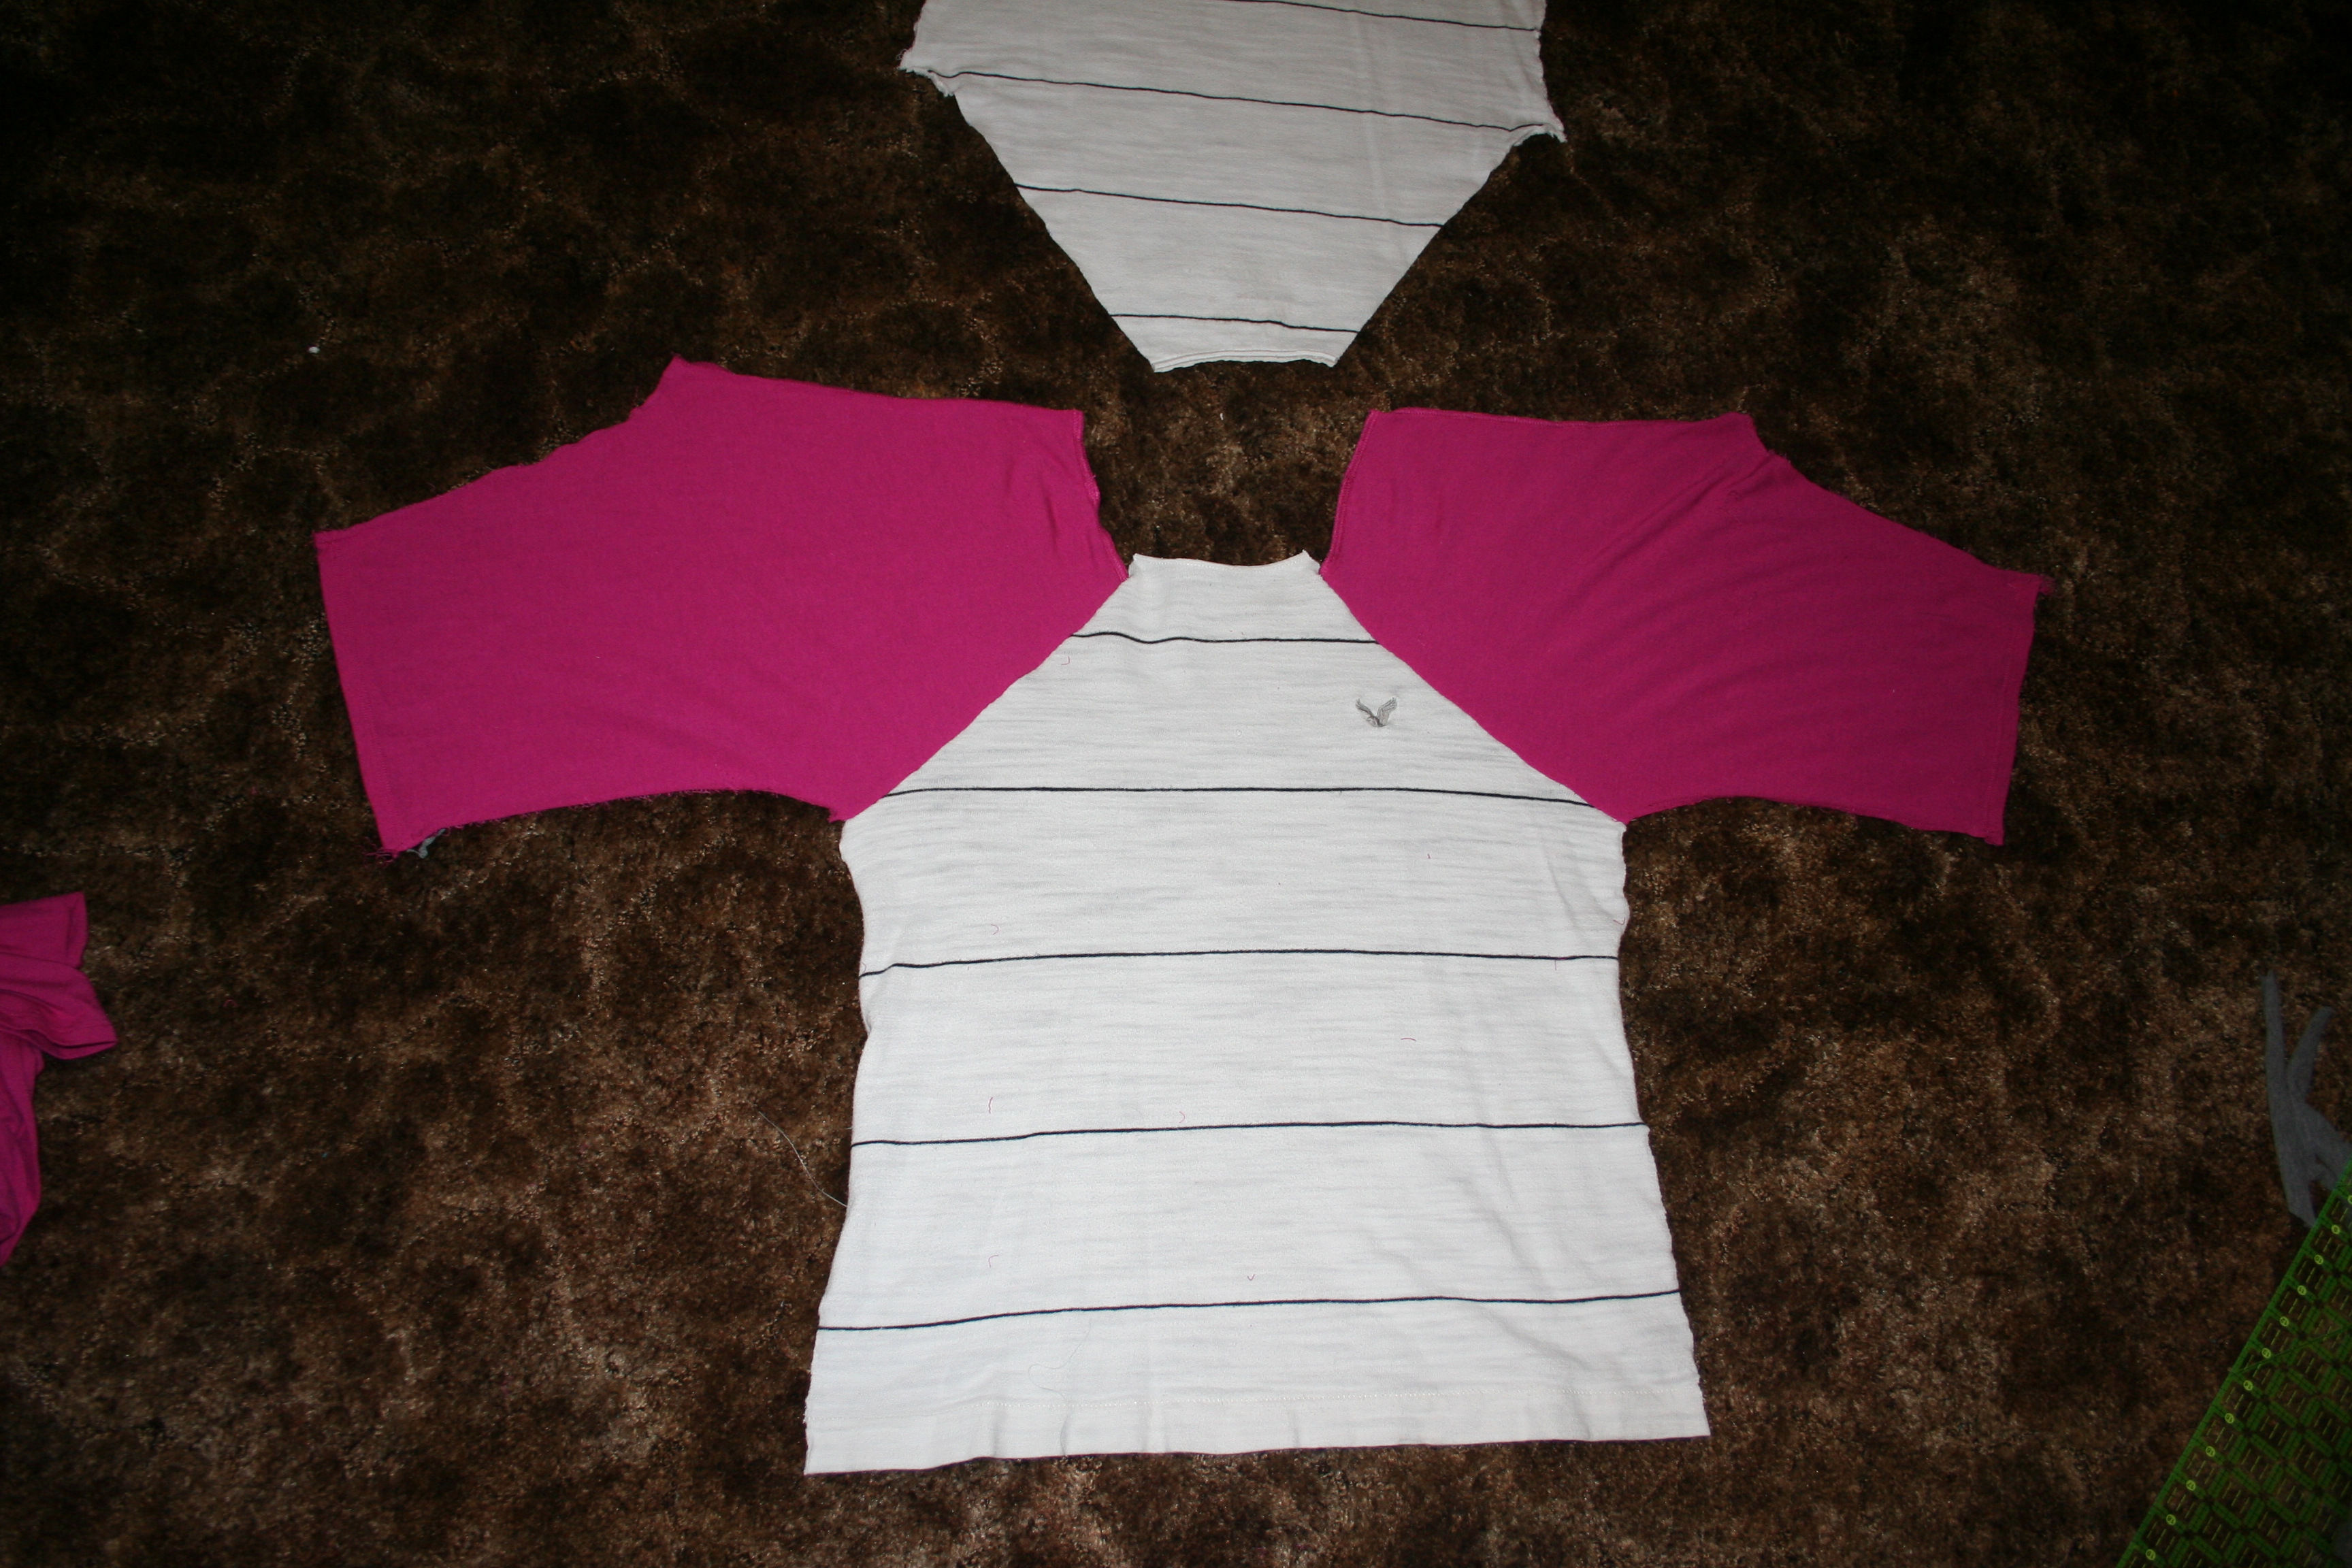
1. Deconstruct

Cutting at Seams
White shirt – cut as close to the side seams as possible. Cut around sleeves and shoulders so that the shirt is deconstructed. I kind of felt like a sewing surgeon 😉

Deconstructed Shirt
Note – you’ll notice that I didn’t cut through the collar yet in the picture above because I wasn’t sure if I would try to salvage the original collar or discard it. In the end, I ended up discarding and cutting it out.

New Sleeves
I didn’t take a picture of how I cut out the pink sleeves, but I just cut as close as possible to the seams around the armhole and under arm towards the wrist. Separate the pieces and lay them out to visually see how they will look when done. Exciting!
2. Cut New Pieces
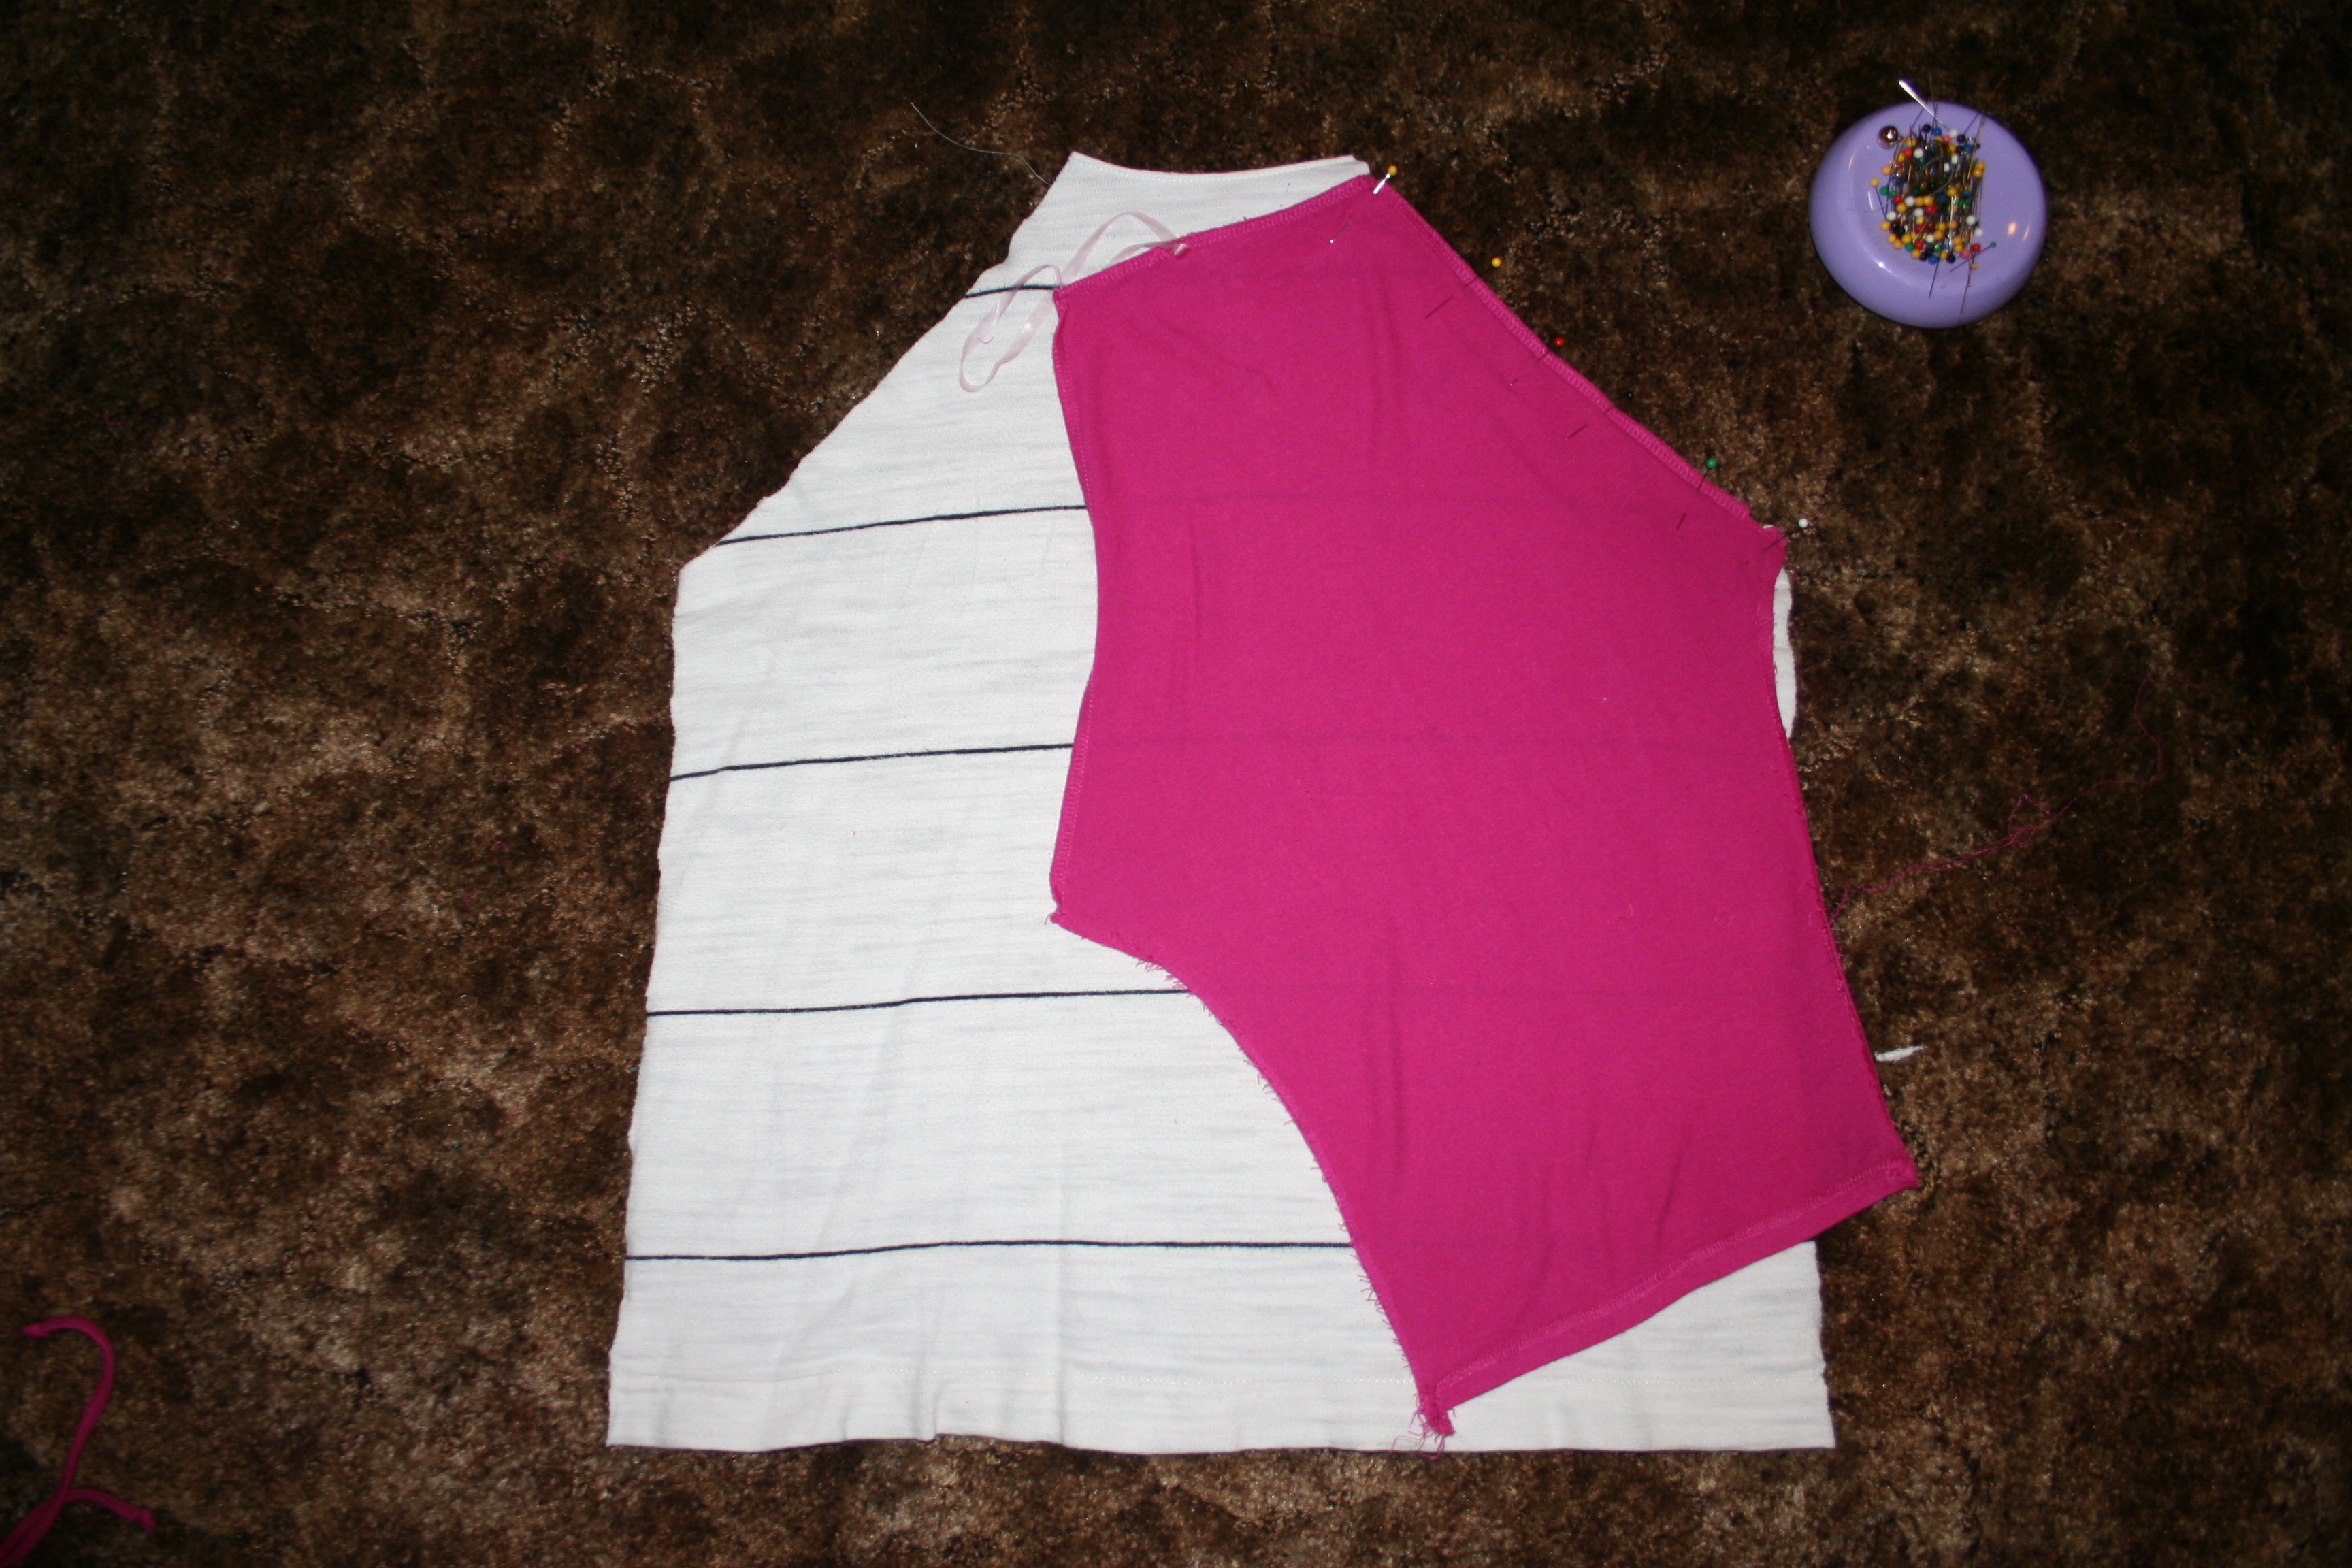
Cut Shirt Front and Back
Unfortunately I did not get a good picture of how I cut the front and back pieces with the angle going in towards the neck. But In the picture above, I’m starting the process of attaching the sleeve (right sides together) but I wanted to show the cuts I made into the front of the white shirt. I didn’t follow anything specific, I just eyeballed where I wanted the pink sleeve to sit and drew a straight light from the armpit of the white shirt to a few inches from the center of the neckline. Repeat on the other side, being very careful if your shirt has stripes to keep the stripes parallel and evenly spaced with the new cut lines. Repeat on the back.
3. Assemble Arms
Pin the front and left sleeve with right sides together and stitch using a stretch stitch since the materials are knit. Repeat with the right sleeve and you’ll have something that looks like this:
Sleeves Attached
Note: the white collar is not even with the sleeves. I decided not to worry about the shape of the collar until I had the shirt assembled.

Attaching the Back to the Sleeves
With right sides together, attach the back piece to the sleeves.
Fold shirt together, right sides together so that it looks like a shirt only inside out. Pin and sew with a stretch stitch the sides and arms. Since working with a striped shirt, pay close attention to lining up the stripes of the front and back pieces when sewing them together.
4. Add Collar

Shirt Without the Collar
The picture above doesn’t have the sides and arms sewn yet, but it gives you an idea of how the neckline looks without the collar. You’ll notice that my white shirt was longer in the center front and back compared to the sleeves. I tried to round out the pink and white by cutting where I saw fit to create a circular shape.
I wasn’t sure what I was going to use for the collar, but then I realized I had a lot of the pink shirt I deconstructed that had subtle ribbing to the material which would work great to finish off the neckline. I cut a strip that was 1 3/4″ wide from the leftover pink knit shirt, folded it in half and pressed it to create a crease.

Attaching Collar
I laid the pink ribbing collar that I just pressed on the right side of the shirt and placed one pin in the back to start. Otherwise, I didn’t use any pins to sew the collar. I just slightly stretched the pink ribbing collar as a sewed around the circle. I would be lying if I said wasn’t crossing my fingers that the stretch of the collar would turn out even and sit nicely around the neck. Success! I was so happy it worked since I consider myself an amateur when it comes to sewing with knits.
Done!
I decided not to add any topstitching, but that would definitely give the shirt a more professional look. Along with finishing the seams with a serger… oh how I hope to one day own a serger. But otherwise, I would say this shirt took me less than a couple hours to make. The most time consuming was researching how others have sewn a raglan sleeve from existing shirts and planning how I would cut the shirts I was going to use for this project. I am already looking forward to the next outfit I plan to upcycle.
Have you worn something that you upcycled? If so, I would love to hear about it.


